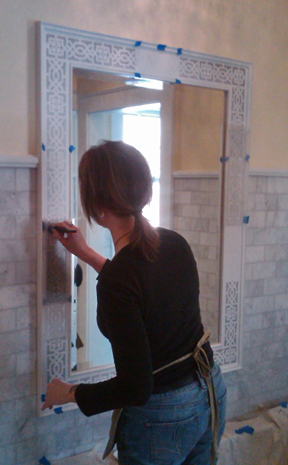
I had the privilege of working with some very nice clients and among other things, they took some photos of me working. I usually forget about this aspect of the job, but when I got the photos, it seemed the perfect way to share this unique job with you.
Stenciling a mirror frame can be a bit of a challenge, making all the pieces fit together and come out right. Using the right design and a few layout tricks can make it easier.
Notice the little pieces of blue masking tape all over the mirror frame. By using the registration marks (little triangles cut into the corners of the stencil plate for alignment purposes) to layout the stencil before you start applying the paint, you can figure out how the stencil is going to fit without going completely bonkers. Using a geometric stencil like the one I am using here, often allow you simpler ways to adjust the design so it will fit – like adding an extra square section or only using half of the rectangle portion. Experimenting on paper is a good way to figure out how to adapt the design as well.
Starting with the corner images, the full length of the stencil repeat or plate can be used in either direction, simplifying the process. The center has been marked on all sides of the mirror so that it will be easy to see the symmetry of the layout where the design need to be adjusted.
Wipe down the stencil plate so it is nice and clean when you are ready to rework the design to make it fit. I will often cut the stencil into smaller, more manageable pieces when it comes time to do this, which sometimes sacrifices the stencil. By stenciling all the easiest areas first, even if I need to touch up an area, I find it is more convenient to work with smaller pieces in tighter areas and so I am willing to offer my stencil plate to the decorative painting gods.
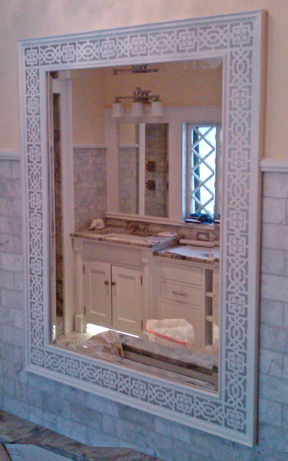
 The finished project done in only one color – iridescent silver. Not what most people first think of when they hear the word Stenciling.
If you look closely at the center points on each side, you will notice how the design was adapted to fit on the mirror – the top and bottom have just a piece of the rectangular portion of the design. The sides have an extra square portion added. This isn’t brain surgery, just a little math, and if that ain’t your forte, practice your layout on paper first. After all, it is just a coat of paint, worst case scenario you repaint or touch up a little, but with a little thinking ahead, you won’t have to do either.
This particular stencil from my line is called Caito – it is 2.75 H x 14.5 L and runs $32.50. But guess what? It is currently not on my website. Hey, if enough people request it, I’ll put it back on the site, but for now it is only for Alice and her occasional looking glass endeavors.


Hey There. I found your blog using msn. This is an extremely well written article. I will be sure to bookmark it and return to read more of your useful info. Thanks for the post. I will certainly return.
Excellent subject, I could not of thougth off that !
Great article and I love the photos. More of this would be fantastic.